Welcome to the Complete Blogging Starter Kit where you’ll learn everything from finding your niche and learning what website builder to use to improve your site speed, staying legal, and making income with blogging.
Read More: 9 Best FREE Blogging Resources
Let’s dive in!
Table of Contents for the Complete Blogging Starter Kit
- A Legal Course for Bloggers & Online Entrepreneurs
- Copyright Notice TEMPLATE: Protect your Content!
- Finding Your Passion: What Should You Blog About?
- Naming Your Travel Blog
- Choosing a Site Type and Purchasing Your Own Domain
- Finding Blog Inspiration and Themes
- Site Speed
- SEO (Search Enginge Optimization)
- Pinterest Image Design and Promotion
- Back-Up Everything
- Stay Legal (Don’t Skip This! Essential Part of the Blogging Starter Kit!)
- Build an Email List
- Create a Management System
- Blog Monetisation: Affiliate Income, Ad Income, Sponsored Content, and Brand Deals
- Travel
- Keep Learning & Invest in Yourself
- Pin The Complete Blogging Starter Kit: Building a Successful Travel Blog From Scratch to SEO”
Free Resources
What Camera Gear Do We Use?
- Camera body: Nikon d750
- Phone: iPhone 13 Pro
- Favorite Multipurpose Travel Lens: 24-120mm f/4
- GoPro: GoPro Hero 8
- Drone: DJI Mavic Air is no longer available so we recommend the DJI Air2S
- Camera Bag: Wandrd Prvke 31L
- Tripod: ESDDI Aluminum Tripod
If you want the full list of things we keep in our camera bag, check out the complete guide or browse our photography guides.
A Legal Course for Bloggers & Online Entrepreneurs
Get all your legals in order to protect your blog/biz, look legit and build trust with your audience… for FREE!
- What legal pages you must have on your blog
- What’s the GDPR and what you need to do to comply
- What’s copyright and how to protect your content
- And so much more!
Copyright Notice TEMPLATE: Protect your Content!
Download this plug-and-play template drafted by a top-class lawyer and get your content legally protected in less than 5 minutes!
Finding Your Passion: What Should You Blog About?
The first step in our blogging starter kit is to learn how to is to find the niche that your blog will be about.
Maybe it’s cooking, photography tutorials, or travel, but whatever it is, be prepared to devote a whole lot of time to it! For the sake of this blogging starter kit guide, we’re going to assume that you’re interested in becoming a travel blogger and therefore will tailor our examples about travel.
Task: Make a list of things that you could write about for the next 10 years without running out of passion
Narrow Into a Specific Niche
Loving travel is great, but it’s way too general. Many of the most successful bloggers are successful because they have narrowed down their niche.
What is a niche?
A niche is defined as “a specialized segment of the market for a particular kind of product or service”. Basically, a niche is your area of expertise. It might be a specific city like London or Edinburgh, or it may be related to a specific audience like van lifers or vegan travelers.
Narrowing down into a niche might feel constraining at first, but it’s vital because it helps define your audience. It also means that later down the line, you can work with brands that align with your values and give them an audience that wants to buy from them. But more on this in the next section.
Remember: You don’t need to try and come up with a niche that mixes all of your interests together. It’s better to create different sites that specifically reflect the content that will be on them – especially if you feel that you’ll struggle to come up with content that works on both. For example, if you love travel and fitness think about the kinds of content that you could create that bring together both niches. If you have an ever-growing list, fantastic, you can make a travel and fitness site. However, if you’re struggling but have lots of ideas within the travel and fitness areas separately. it might be worth creating two different sites and narrowing down your niches within those.
Task: From the list you made of subjects that you’re passionate about, circle your top three. Then, write down three ideas for each with a highly specific niche. At the end of this exercise, you should have 9 different niche ideas.
Consider Who You Want to Write For & Brands That You Want to Work With
A key element in this blogging starter kit is developing your target audience. Remember, you need to be writing for someone besides yourself if you want to make a living as a blogger.
Our audience is mostly 20 to 30 something women which is why you see posts like Sustainable Menstrual Products. Of course, I didn’t have the audience when I started and so instead, I wrote what I knew but felt there could be more info on.
They say that your vibe attracts your tribe, and it is absolutely true. If you write about loaded fries and nachos don’t expect a health food kind of tribe.
When developing your target audience, it helps to create a persona of your ideal reader. Create a name, age, occupation and make a list of your persona’s:
- Struggles
- Activities
- Favorite brands
- Income
- Travel style
- Habits
This may seem like busywork, but in fact, this persona is something you can look back at every time you write a new blog post. You will write for this persona instead of for yourself and this will help keep you on track creating content that your ideal audience will love.
It’s also important to think about brands when writing this persona. What kinds of brands would your persona purchase from and perhaps more importantly, which would they steer away from? You want. to make sure that you’re comfortable and excited about working with the brands that your persona loves. When all of these things align, you’ve got a very successful brand campaign!
I want to stress that this and the previous sections may take you a few days or even weeks to complete. If the creative juices aren’t following today, take a walk and come back to it or try again tomorrow.
For a really comprehensive guide to all of this, complete with beautiful and helpful worksheets, I recommend The Power of Instagram course by Club Life Design. While the course is technically an Instagram course, the business development that they take you through applies perfectly to bloggers.
You can read our full review here.
Task: Pick one of the niches from the previous task. Now, with this niche in mind, develop a comprehensive persona of your ideal blog reader and the brands they love and hate.
Naming Your Travel Blog
Of course, a big part of this free blogging starter kit guide is developing your travel blog’s name!
One of the most important things to consider when brainstorming travel blog names is that you want a name people can easily hear, understand, and spell.
In hindsight, Voyaging Herbivore requires a bit more diction when stated out loud, but it describes us well.
Think simple: The Blonde Abroad is a great example because it’s easy to understand and remember. Of course, you’ll have to get a little more creative because many of these great names are already taken.
Quick Tips for Travel Blog Names
Make it easy to remember and pronounce: As we talked about above, you shouldn’t need to repeat your travel blog name more than once. Keep it short and snappy.
Synergy: Make sure it’s not taken on other platforms. Even if you have no hopes of becoming a YouTube star, you don’t want someone else to have the name already.
Think Ahead: Don’t create a name that locks you into something. I once saw the example of “The Partying Traveler”. While it’s a great name and easy to remember, if you ever wanted to settle down or spend a few nights in, you’ll likely lose some of your following because they think of you as the person who goes out every weekend and blogs about it. Similarly, having anything with the word “single” could be an issue. But of course, use your own judgment!
TASK: Get a piece of paper and brainstorm words associated with your niche and then with you as a person. Take a few days with this if necessary. We all know that sometimes the best ideas come in the shower! Bookmark this page and come back to it later when you’ve got some travel blog names.
Choosing a Site Type and Purchasing Your Own Domain
Which is Better: WordPress, Squarespace, Wix, Shopify, Adobe Portfolio?
If your goal is to create a blog that becomes monetized by selling ad space, sponsored posts, and affiliate income while giving yourself the option to expand later on and sell your own products, the answer is easy:
WordPress.
One more time for the people in the back! WordPress!
“But why WordPress?” I hear you asking.
Without writing another article completely (should I add this to the editorial calendar – let me know in the comments!) it comes down to this:
- WordPress is the most customizable
- WordPress is the most affordable
- WordPress help forums are incredible
- Endless free plugins
- Indsustry standard
- Endless guides for installation, design, bugs, and literally everything
The biggest argument against WordPress is that it requires coding and lots of technical knowledge.
This is simply not true.
I know absolutely nothing about coding and although I have learned more technical knowledge since creating my blog, if I can learn it so can you.
The reason that so many people opt for alternatives like Squarespace, Shopify, Wix, or Weebly is because they think that it will be easier. Sure, it might be a few clicks but there are so many drawbacks. For example, if you want these add ons, you have to pay for them. They’re free on a WordPress site:
- Email with your domain
- Integration into the email provider of your choice: Many limit to Mailchimp which is one of the most expensive
- Detailed analytics: Google Analytics provides this for free but you do need to connect your site. Platforms like Squarespace and Shopify put up a paywall between you and the integration so you pay them, to access something that is free to everyone else
- Ecommerce: WordPress has a FREE plugin called WooCommerce that provides everything you need with paid upgrade options
This is just the tip of the iceberg but I’ll save my full rant for a different blog post.
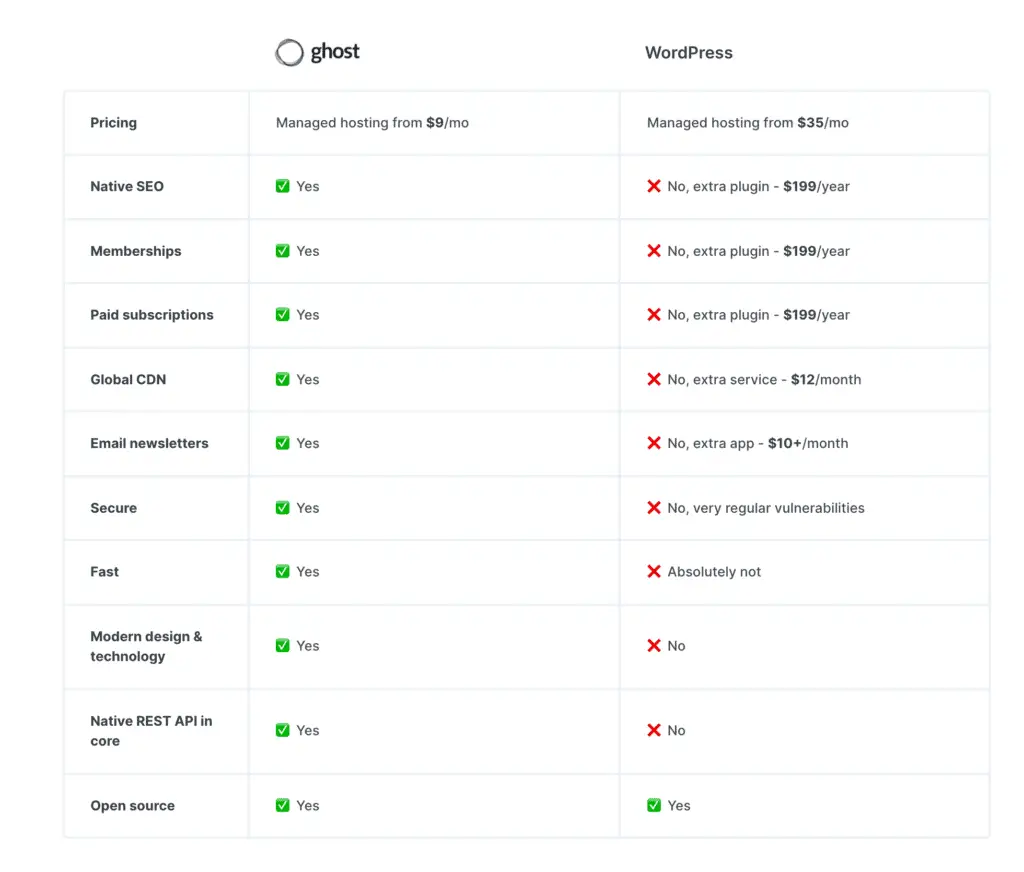
I also want to point out sites with comparison charts like this one. Ghost claims to be a modern WordPress alternative and unless you know what you’re looking at, it does seem like a good deal.
Let’s break it down a little bit:
- “Managed hosting” is something you do not need unless you run a major site (we’re talking 100,000+. If you have 100,000+ pageviews why are you here? Get shared SSD hosting at Bluehost for about $6/month)
- SEO is a learned skill not built into a site. Yoast SEO has a free plugin that is perfect for starting your SEO journey (we’ll talk more about SEO later)
- Memberships: You can pay $199 for the Woocommerce addon, but there are plenty of workarounds
- Paid subscriptions: You can pay $199 for the Woocommerce addon, but there are plenty of workarounds
- Global CDN: Get one for free from Ezoic or Cloudfare but you don’t really need one when you’re starting out
- Email Newsletters: Loads of free newsletter options (I would also guess that they say “newsletters” for a reason. A newsletter is a basic email blast, but they probably charge extra for automations that are free for other sites)
- Fast: WordPress can get heavy if you overload it with plugins but that’s the great thing: if you can choose between thousands of plugins to customize your site and remove the ones that aren’t working
- Modern design and technology: Again, tens of thousands of modern and beautiful themes. You can make your site look like anything you want or keep it simple and straightforward. Plus, there are endless free themes to choose from.
- Native REST API in Core: I’ll be honest, I have no idea what this is. I looked it up and didn’t understand it. It hasn’t made a difference in my site yet, so I wouldn’t worry about it.
It’s also worth keeping in mind that these sites have great affiliate programs. For example, I pay about $6 a month for hosting my site and domain on Bigscoots. If you also choose Bigscoots and go through my affiliate link (thank you by the way) you get a few dollars off and I get maybe a dollar or two a month as long as you keep using Bigscoots.
Now, if I was preaching to you about Squarespace, I might say that the Commerce plan is the perfect way to set up your business website and start selling. If you sign up through my link, you pay about $25 per month (that doesn’t even include sending automated emails like abandoned cart emails, selling subscriptions, or selling discounts) and I get $200. If you’re a new user and you sign up for any plan, I get $100.
So just from these numbers, you can see how recommendations get skewed in favor of who has a bigger affiliate payout. This blogging starter kit is not about the biggest affiliate payout! It’s about proving a resource and our hoenst opinion as full-time bloggers and digital marketing professionals is to use WordPress.
At the end of the day, WordPress does have a learning curve but so does Photoshop, and DSLR cameras, and cooking, and wood carving, and converting a van.
Life is a learning curve. Do yourself a favor and start with WordPress from the beginning.
Why Do You Need Your Own Domain?
Think about it this way: When you search for something, are you more willing to find the information reliable if it comes from, for example, “travel.com” or “travel.wordpress.com”. Probably the first one! You’ll take yourself more seriously and others will too. It’s not very expensive, but it might just be the kick in the butt that you need to get to work.
What Is Hosting?
Basically, it’s like paying rent for a space to use on the internet. Hosting is important because it allows you to have the strictly “.com” ending and get support if there are issues. You can also pay a little bit extra to protect your personal information associated with the site (which I recommend and which is included in Bigscoots).
What Is a Domain?
A domain is the URL of your website. Ours is www.voyagingherbivore.com but in order to have a domain, you need to purchase a space through a hosting site.
How to Purchase a Domain and Install WordPress
Click here to be taken to Bigscoots. At the top of the page, hover over “Managed WordPress Hosting” and click on “Shared”. Select the cheapest 105CC plan (you can have 5 websites on this!) and proceed to the checkout.
To get 20% off every month use the code D9LK83CPOC95
After checking out, you can then follow these guides by Bigscoots to install WordPress and set up your sight basics.
How to Install WordPress With Bigscoots
Finding Blog Inspiration and Themes
If you’ve just purchased your new website, I recommend watching this video to get your site looking more professional. When I was first learning how to start a blog, this is the video I watched and it really helped me learn WordPress and figure out what I liked in a site.
TASK: Find a few travel blogs you love the look of.
Two of my favorites are Salt in Our Hair and The Blonde Abroad. Although they’re quite different, they are both beautiful and unique and I often turn to them when I need design inspiration. Having design aspirations will help you figure out how you want your blog to look. You can also create a Pinterest vision board with different color and design themes that you can reference later.
Keep in mind that the creators of Salt in Our Hair were graphic designers and web developers before they were bloggers, so their website is guaranteed to be amazing. The Blonde Abroad has a full team that works with her to create a beautiful, responsive, and unique site. Although looks are important don’t overthink this part. You can always change it and the most important thing is to start getting high quality content out as soon as possible!
Professional Theme
Purchasing a professional theme is something I wish I had done earlier on. Setting up the first version of my site to a level I was somewhat proud of took weeks to accomplish. But that was early on in my journey of learning how to start a blog. Years later, I then installed a theme that took about 30 minutes and it looked better than my weeks of work.
Basically, if you really want to get serious, stick to your strengths and let the design experts do their work. Purchasing a theme that I already loved made me happier than ever with my website and meant that I had customer support available when things went wrong.
We used to use the theme below from Station Seven which has been easy to use and was a one-time fee with lifetime updates, as opposed to a monthly fee that some other themes have. Unfortunately, Station Seven no longer offers this specific theme for WordPress and if you go on their website they don’t seem to offer any WordPress themes as they are now a Squarespace only site (that affiliate income though am I right? 🙃).
However, I did a little digging and it seems that they do still have one WordPress theme available: Coastal. I briefly considered redoing the entire site with this theme because I love how it looks, but then decided the to do list was long enough already!
If the Coastal theme isn’t for you, there are hundreds if not thousands of free and premium WordPress themes available. A quick Google will reveal days worth of pages to look through so have a browse and don’t forget that you can always change it!
TASK: Find a theme that you want to use on your website.
Envato Elements and aThemes are great theme marketplaces to start in.

Site Speed
Site speed: the enemy of website owners everywhere.
Here are a few things to keep in mind:
- If you’re not using a plugin, delete it
- Different plugins can “weigh” on your site differently – do your research when deciding between a few that do the same thing
- Optimize your images
- Optimize your images
- Optimize your images
Make those images as small as possible without them looking bad. After much trial and error, a few dollars spent in the wrong places, and many customer service emails to Station Seven (who runs our theme and are so helpful even when it’s not their job!) we came across Short Pixel.
ShortPixel is one of many plugins that promises to reduce your image size without loss of quality.
With the free plan, you can get 100 images reduced each month but wanted to reduce everything on the site to see if our speed would improve. We purchased 10,000 images for $10.
It was the best $10 I have ever spent!
Do yourself a favor and buy a one-time (meaning it doesn’t renew each month) 10K deal to get your website off to a good start.
It’s easy to link ShortPixel with your website. Purchase your desired number of credits at their website. Download the plugin, sign into your account, and ta da! Let the optimizing begin.
They almost always have a Black Friday sale, so be sure to subscribe below for updates and check out our Black Friday Deals for Bloggers Guide (updated annually).
TASK: Head to ShortPixel and grab yourself some image optimization credits and link with your website.
SEO (Search Enginge Optimization)
If you only take away one thing from this free blogging starter kit, let it be this section.
I used to hate SEO. It was scary and was constantly put on the backburner. But now, I love it.
Everyone always wants to know how to get more website traffic when in reality, the answer is pretty straightforward: start with SEO from the beginning and craft every post to be SEO optimized.
Basically, the better your SEO, the higher you appear in Google. Install the plugin Yoast SEO and let it guide you towards better posts.
We also highly recommend investing in Keysearch. Keysearch is a great tool that I wish we had used right off the bat! It helps you discover what keywords to place in your articles so that you rank on Google. You then use these keywords together with Yoast to help your post rank on the first page of Google. Keysearch also offers a free training course for SEO that you absolutely need to take.
Keysearch also has a great content assistant tool that can help you discover what people are searching for but that there isn’t much info on, meaning you can rank in Google!
Discount Code: Head to Keysearch and use KSDISC for 20% off your purchase.
TASK: Install the Yoast SEO Plugin and follow their setup tutorial. Then, head to Keysearch and sign up for a package. Going through this link and using the discount code KSDISC means that you’ll get 20% off every month.
Pinterest Image Design and Promotion
No blogging starter kit is complete without a discussion on socials. In the case of blogs, Pinterest is one of the biggest drivers of traffic.
I hate bad Pinterest images. I am of course referring to my year-old Pinterest images which are awful. Don’t look at them. The reason I hate bad Pinterest images is because Pinterest is a major website traffic driver, and bad pins ruin that.
If you don’t have Photoshop (or just don’t know how to use it to its full potential – does anyone really?) check out Canva. It’s free and has some beautiful designs that will make your Pinterest images pop.
You’ll also want to join some group boards on Pinterest. Group boards are an incredible way to up your exposure because the audience of the board constitutes all of the audiences of those who contribute to the board. If you want to join, head over to our Pinterest and send us a request.
Station Seven has some great Canva template bundles, including the Pinterest bundle featured below. Click the image to learn more.
TASK: On Pinterest, start scrolling and pin any images that really stand out to you. Refer back to these when making our own pins.

Finding Beautiful Images
Sometimes you don’t have quite the image that you need to make a blog post or a Pinterest pin really pop.
You should go around pulling random photogs from the internet because you’re likely violating copyright laws.
From time to time, we use Unsplash, which is a site where professionals upload photos that are free for anyone to use for any purpose.
You might ask yourself, why would anyone just give photos away? We upload photos from time to time because it increases our exposure and because we use photos from the site as well. Give a little get a little.
You can also purchase images from Shutterstock or Adobe Stock for reasonable prices. It’s also worth checking out App Sumo because you can often find great deals for stock photo sites on there.
Back-Up Everything
Yesterday, in an effort to make more space on my computer, I accidentally deleted all of my mobile Lightroom uploads and because I’m very confident when it comes to deleting things, I also emptied my recycle bin.
There go half of my pictures.
Sigh.
So I write this today to share with you something called Backblaze. Backblaze is a storage site that creates a mirror image of your hard drive and any external hard drives that are plugged into your computer.
It’s about $7/month for unlimited storage including external hard drives. It’s super simple. Just install their program and it runs in the background to copy everything to the cloud. If you delete something on your computer it will remain in the cloud for 30 days (or longer if you pay extra), so hopefully long enough to realize that you deleted something and need it back.
If you’ve gone through Bigscoots for your website, automatic backups of your site are included.
TASK: Do yourself a favor and invest in Backblaze.
You can get a free month by purchasing through this link.
Stay Legal (Don’t Skip This! Essential Part of the Blogging Starter Kit!)
As boring as it may seem, a blogging starter kit isn’t complete without the legal stuff.
I am not a lawyer nor do I have any legal training, so everything here is meant only as friendly advice from my own experience, not legal recommendations.
Basically, if you have ads, affiliate links, sell products, use any sort of analytics software (like Google Analytics), or collect emails, you need legal disclaimers.
Don’t try and use free stuff you find online or other people’s privacy policies or disclosures because you just don’t know how good they are. Instead, here’s what I recommend investing in:
- Blogging for New Bloggers GDPR Compliant Course
- Legally Blog Course
- Legal Pages for Blog Bundle
- Legal Documents and Bundles for Bloggers, Coaches, Businesses and More
You can find more fantastic courses and legal documents here from a professional lawyer and full-time blogger!
TASK: Check out the recommended resources and figure out which is best for you and your blog. Get your legal documents up on your website and any other recommendations from the courses.
Build an Email List
Alright, blogging starter kit readers – you’re nearly done with this guide! Good for you! Now it’s about to get really fun. Let’s dive into email lists.
If you’re running a blog, shop, or really any kind of website that you want to get significant traffic to or sell products on, you need an email list.
There are dozens of different platforms to choose from but I recommend Mailerlite or ConvertKit.
Mailerlite is free to use for up to 1000 subscribers while giving you access to almost all of the features. That means that you can send newsletters, create website pop-ups, and create automations and funnels based on user interaction with emails and store products (abandoned cart emails for example). We personally use Mailerlite and most likely will for the next several years at least. We have so many automations and templates built within the platform that it would be a nightmare to move. Plus, their customer service is really helpful – even on a free account! The downside of Mailerlite is that you really have to figure GDPR out yourself. Additionally, if you want to upgrade to premium it’s $100 per month and more if you have over 1000 subscribers.
Many other websites, like Mailchimp, charge you to use these features, and email list hosting is not cheap!
Another option that most major bloggers use is ConvertKit. You can sign up for their free plan here but keep in mind that on this plan you can’t create any automations or funnels, and you lose a lot of the features. If you want to access more of these features, you have to pay $9, and to access all features, it’s $25/month. All of these prices are for only up to 300 subscribers so if you have more you’ll have to pay extra. The one benefit of Convertkit is that their GDPR automations are the best that I’ve come across.
At the end of the day, pick the platform that you want to stick with long term. You don’t want to mess around trying to move automations, funnels, and custom templates around. Finally, I want to point out that you likely won’t be reaching 1000 or even 300 subscribers anytime soon, nor do you want to. Clearing out inactive subscribers may seem like a bad thing, but it actually increases engagement, clickthrough, and conversion rates of your email list which means that you can charge more to talk about a brand in your newsletter.
TASK: Research more into Mailerlite and Convertkit and
sign up for whichever will work the best for you.
Create a Management System
Creating an online management system will help you stay organized and on track to meet your goals. It’s better to use an online management system because as a travel blogger you’ll be taking your tasks on the road with you and it’s one less thing to carry! Additionally, it’s important to use a system that can grow with you as your team expands. Most full-time bloggers have extra help. Often, they’ll have a virtual assistant that works with them, and having an online management system in place makes it easy to add them into the workflow.
Basically, start as you mean to finish.
We use Asana to manage pretty much everything that goes with the blog.
We love Asana because it’s free (hooray!) and has different layout options. You can assign tasks to people, make subtasks, and have different projects. We have three different sections: an Editorial Calendar, Client Work, and General Management.
Once you start working with brands, you’ll also need to worry about invoicing and contracts. We love Indy because for about $6/month you can manage your contacts, create contracts, invoices, time tracking, and more. If you want a free month of Indy, drop us a follow send us a message on Instagram with your email and we’ll get you added ASAP.
Finally, if you’re making money from your website in any way, you’ll need to pay your taxes. The Legally Blogs course talks more about forming an LLC and business basics, but we’ve found that Quickbooks Self Employed is the best financial management system for helping us keep organized with our dedication and pay our taxes. You can get 50% off QuickBooks through this link.
Although this may sound a bit tedious, it’s a very important part of the blogging starter kit that you need to make sure you stick to!
TASK: Get yourself set up with Asana, Indy, and Quickbooks Self Employed.
Blog Monetisation: Affiliate Income, Ad Income, Sponsored Content, and Brand Deals
Perhaps the most sought-after part of the blogging starter kit is learning how to make money with your blog.
Another great way of monetising your blog is by adding an interactive map, read more: Proxi – The BEST Free Interactive Website Map software
Affiliate Income
Affiliate income is one of the best ways for bloggers to earn money. Affiliate income is where a brand creates a unique link to its website or specific products. This link is then distributed by the blogger on their website and/or other social channels. When people click through these links and then make a purchase, the blogger gets a small commission. This is at no extra cost to the person buying, but it just means that the blogger gets a little something for the time and effort put into creating content.
Affiliate linking is particularly successful for bloggers because it’s not as salesy as links are on social media. For example, this post has loads of affiliate links in it, but because it’s a very long blogging starter kit guide that provides value (I hope!) it doesn’t come off as “in your face”. I’m genuinely providing recommendations for tools that I use, so I hope that you’ll click through the links!
This post is an example of one that features a single product.
Here are a few sites and plugins that are really helpful for growing your affiliate income:
Ad Income
One of the biggest ways that blogs earn money is through selling ad space. The ads you see on this website for example generate income through views and clicks. SO every time you click on an ad, it actually really helps us out! The more pageviews a website gets the more ad revenue it will have. There are plenty of platforms that facilitate this including Ezoic, Google Adsense, She Media, and Mediavine, however, the ones that generate the most revenue generally have a minimum number of monthly page views to be accepted.
Sponsored Content/Brand Deals
Sponsored content is probably the type of income that most people are familiar with. We see influencers doing sponsored content on all social media platforms. With blogging, sponsored content is similar but to Instagram or TikTok, but there are actually so many more options.
Here are a few ways that you can work with brands to generate income:
- Full sponsored blog post reviewing the product or featuring the product
- Affiliate links within sponsored posts (so you get paid for. thearticle and in affiliaite sales)
- Selling adspace to brands in existing articles (getting paid to insert sponsored content into an existing post)
If you want to learn more about brand deals, check out this free 1 hour content creator training and our reviews on Lost Creator Academy, Club Life Design, and Wanderful.
Sell Your Own Product
The best way to make money is by selling your own product on your own website. While ad income, affiliate income. and sponsored content are good, they rely on so many other variables including timing, budget, being found and approached, pitching, etc. By selling your own product on your own website (instead of Etsy for example), you have complete control.
Check out our products in our shop!
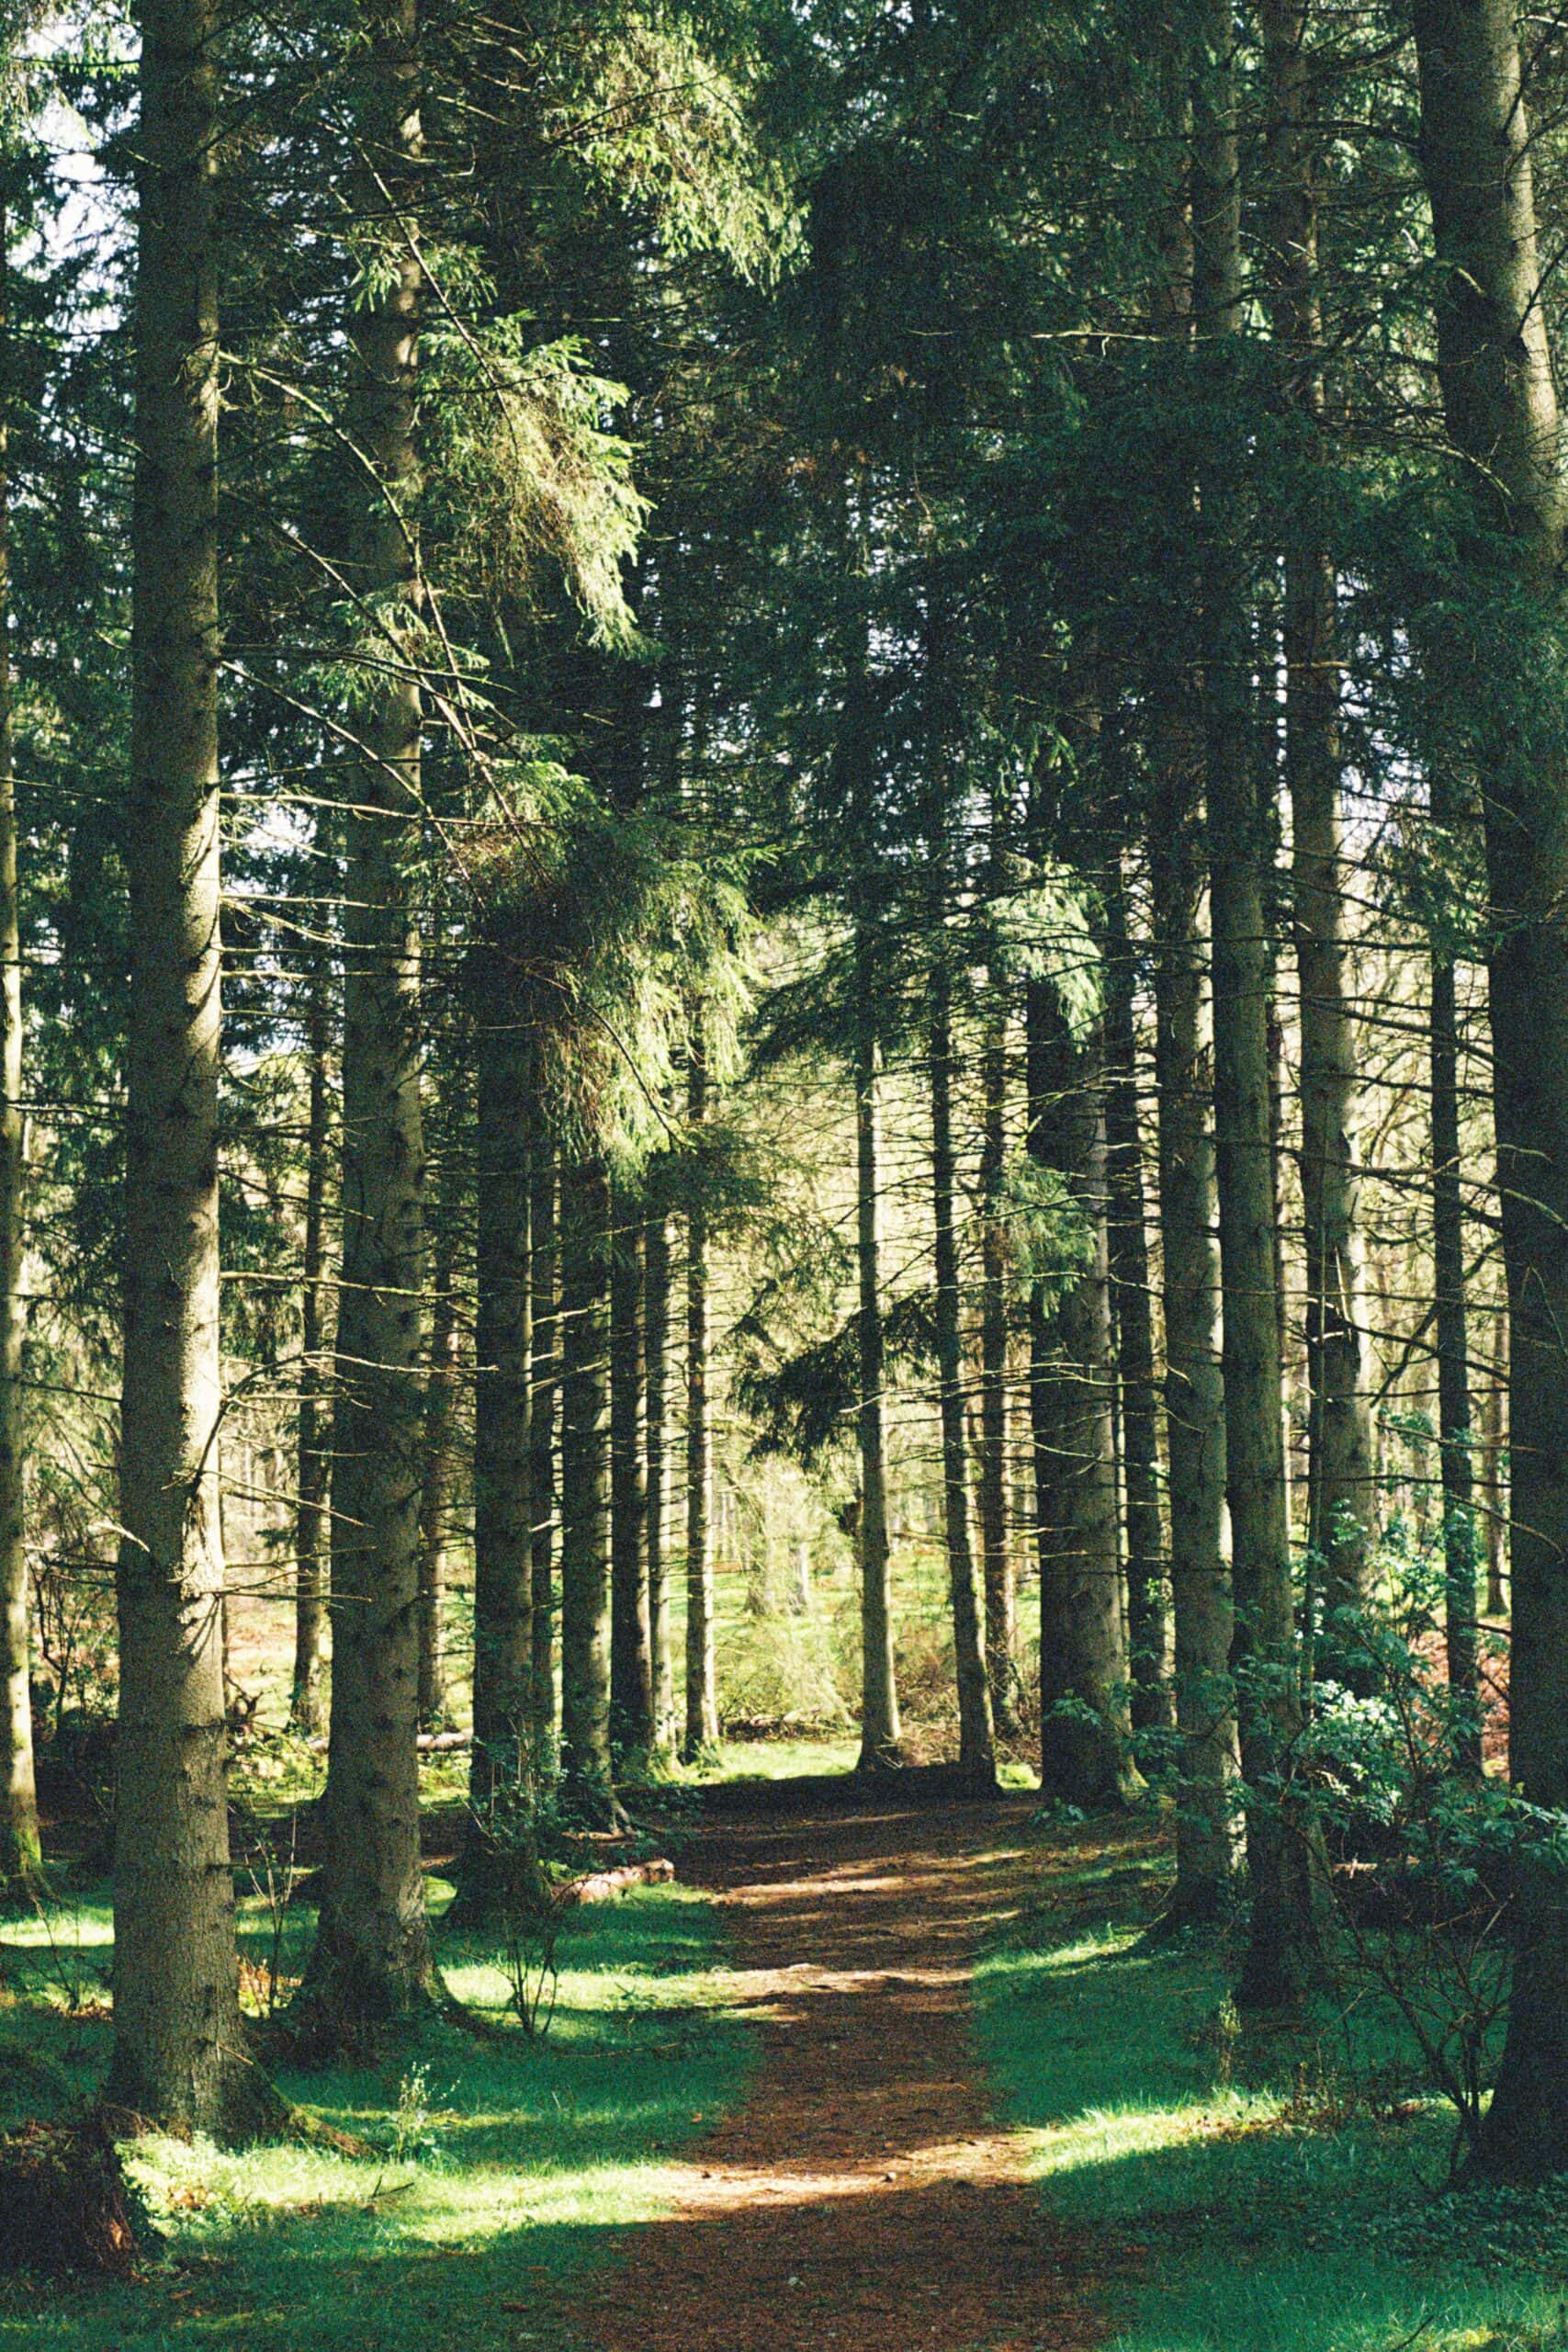
Travel
You can’t be a travel blogger and not travel.
Even if it’s just a couple of times a year and weekend trips, start writing and be sure to photograph everything! Take notes of all the things you do on a trip and be sure to showcase the good, the bad, and the ugly.
The best piece of advice that we can give you in this travel blogging starter kit is this: Travel is not all glamour and first-class upgrades. No, it’s economy and wearing the same underwear inside out because you didn’t pack enough. Share your truthful experiences with your audience, be yourself, and never work with brands that don’t align with your values.
Read More: Travel Bloggers Recommend Their Favorite Travel Books
Keep Learning & Invest in Yourself
That wraps up our free ultimate blogging starter kit!
If you want to be a successful blogger, the key is to keep going. So many people start blogs but give up on them and don’t take the time to learn SEO, or photography, or how to work with brands.
The best thing that you can do for the future of your blog is to keep writing, and above all, keep learning!
Here are a few of my recommended resources for bloggers:
- Wanderful | Read our full review
- Club Life Design | Read our full review
- Lost Creator Academy | Read our full review
- FREE 1 hour content creator training
- Make Traffic Happen
- Passive Income Superstars Course
Free Resources
Pin The Complete Blogging Starter Kit: Building a Successful Travel Blog From Scratch to SEO”
And as always, you can find more sustainable travel content on Instagram @VoyagingHerbivore, Youtube, and TikTok and to get updates straight to your inbox, enter your email below.
If you found this guide helpful and want to help us keep these resources free,
please consider making your next Amazon, Expedia, Hostel World, Etsy, Trivago, and Booking.com purchase through our links (just click right on those words – you can do it right now and unless you clear your cookies before your next purchase, it will remember). It costs you no extra and gives us a small commission. Thank you!

Leave a Reply